Choosing the Right Insulation for Your Needs

Insulation Perth is material that resists the flow of heat, reducing heating and cooling costs. It also reduces noise levels and helps meet OSHA standards for workplace safety and comfort.

Insulation

Homebuyers today are looking for energy efficient homes with good insulation. Proper insulation is a simple and affordable upgrade that is easily installable by a homeowner.

Insulation slows the transfer of heat between spaces in a home or building, making it easier for heating and cooling systems to keep indoor temperatures steady. This helps minimize energy consumption by allowing a building to stay warmer in winter and cooler in summer without the need for excessive heating and cooling. Depending on the climate, homes and buildings that are adequately insulated can save an average of 11% on their annual energy bills.

During the early stages of human civilization, prehistoric peoples used animal skins and plants to provide thermal insulation for their shelters. Later, as people developed agriculture, they began constructing stone, earth and cave dwellings to protect themselves from wild animals, harsh weather conditions and extremes of temperature.

Today, a variety of materials are available to create effective thermal insulation and reduce energy consumption and carbon emissions. Typically, insulation materials are made of nonmetallic substances filled with air pockets. The air pockets resist the flow of heat about 15,000 times better than a good metallic conductor of the same thickness. Insulation is rated according to its thermal resistance, or R-value. The higher the R-value, the more effective the material.

Most homes in the United States are under-insulated and have significant air leaks. Sealing these leaks and adding insulation is one of the most cost-effective ways to improve energy efficiency. This not only reduces energy bills, but also minimizes the amount of greenhouse gases emitted by powering your appliances and heating and cooling system.

In addition to reducing energy costs, proper insulation provides comfort and durability for the home. It maintains a consistent interior temperature throughout the year, reducing drafts and eliminating cold spots. It also helps prevent moisture infiltration, which can contribute to mold growth, rot, and other structural problems.

If you’re ready to start saving on your energy expenses, get started with Drawdown’s insulation solution. Check out our Massachusetts Mass Save rebate program for more information on a high-performance home upgrade. We also offer a free in-home energy assessment. Then contact our team to learn about your options for installing insulation and air sealing in your home or business.

Reduces Greenhouse Gas Emissions

Insulation reduces carbon footprints by reducing the use of fossil fuels such as natural gas, propane, fuel oil, and electricity to heat and cool buildings. This conserves nonrenewable energy supplies and helps to prevent air pollution. In addition, insulation reduces the amount of greenhouse gases released during the production and combustion of these fossil fuels.

Increasingly, homeowners and builders are placing more emphasis on choosing building materials that minimize environmental impact. This includes seeking out products that are recycled, responsibly sourced, and have low embodied carbon. In particular, a focus is placed on energy-efficient and eco-friendly building products like insulation that are made from natural or recycled materials.

The type of insulation used can have a significant impact on a building’s overall embodied carbon, or the amount of carbon it contains when manufactured and installed. Different insulation materials have varying levels of embodied carbon, with some types having significantly higher levels than others. For example, spray foam insulation is a popular option for new construction, but it is not sustainable and poses health risks due to the volatile organic compounds (VOCs) it releases during installation.

Cellulose, on the other hand, has a very low embodied carbon compared to other insulation types. This is because cellulose is produced using natural materials, while most competing products are manufactured from plastics. Additionally, cellulose insulation can be used with lower carbon energy sources such as solar or wind power, which further reduces its carbon footprint.

When comparing the carbon footprints of different insulation types, it is important to consider both the embodied carbon and the operational carbon emissions. The embodied carbon is the total amount of greenhouse gases that are emitted during manufacturing, including the use of blowing agents and transportation. The operational carbon emissions refer to the carbon dioxide that is emitted during heating and cooling.

The best way to determine the overall carbon performance of insulation is to calculate its carbon avoidance, or how much greenhouse gases it saves over its 75-year life span compared to its embodied carbon. The chart below compares the carbon avoidance of several different insulation types, with cellulose insulation clearly outperforming all competitors.

Increases Home Value

While many homeowners renovate their homes to make them more aesthetically pleasing, some fail to realize that updating insulation is one of the best ways to increase a property’s value. This is because potential buyers are interested in a home that is energy efficient and has low utility bills, since this translates to lower monthly energy costs. Additionally, newer insulation helps to keep a home cooler during the summer and warmer during the winter, which is more comfortable.

Insulation is also environmentally friendly as it reduces the use of natural gas, fuel oil, propane and electricity to heat and cool a house, thus lowering emissions that cause global warming. Furthermore, certain insulating materials like cellulose are made from recycled materials, which is great news for the environment as well.

A home with good insulation will reduce heating and cooling costs, improve indoor air quality, reduce noise pollution and leave behind a smaller carbon footprint, all of which are valuable selling points for your home. Additionally, as energy costs continue to rise, re-insulating your home can help to mitigate the cost increases for future owners of your home, making it a sound financial investment.

Adding or replacing old insulation is a relatively affordable project that can be done quickly, especially when compared to other home improvement projects with high return on investment. In fact, according to Remodeler Magazine’s annual “Cost vs. Value” report, upgrading your attic with fiberglass insulation is the highest returning home improvement project, recouping 117% of its initial cost in increased home value upon sale.

As more and more homeowners are becoming aware of the benefits of insulation, they are increasingly seeking this feature when buying a new home. Appraisers are also taking note of the energy efficiency features of a home, as they are seen as investments in future savings and sustainability, and can help to boost a home’s market value.

A well-insulated home is a warm, cozy home and it will stay that way all year round – even during the harsh winter weather! In addition, a well-insulated home will allow the HVAC system to work more efficiently as it won’t be working so hard to maintain your preferred temperature.

Reduces Health Issues

Insulation does more than increase energy efficiency. It is also a crucial element in controlling indoor temperature, sound and humidity levels and providing a healthier environment for people to live and work in. This can make a significant difference to the quality of life for elderly and socially disadvantaged people as well as reducing energy costs, which are often a major financial burden.

Insufficient insulation allows outdoor air pollutants like pollen, dust mites and mold to enter and accumulate in the home. These irritants can cause breathing problems, dry throats, itchy eyes and other respiratory issues. They can also impact indoor air quality (IAQ) and contribute to long-term health problems.

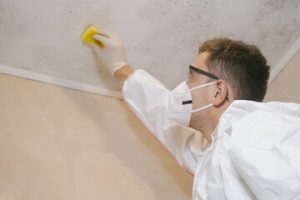
Poor insulation can also cause moisture accumulation and damage to structures, which is an issue because of the potential health risks it presents. Wet insulation can lead to mold and mildew growth, which can release spores into the home and spread throughout the air. This can be a serious problem for those with weak immune systems, young children and the elderly.

When wet, fiberglass insulation can also release formaldehyde into the home. This is an issue because formaldehyde has been linked to a range of health issues, including eye, nose and throat irritation and asthma symptoms. It can also trigger allergies and may even cause cancer in some cases. Insulation made of natural materials, such as cellulose, wool and cotton can avoid this issue because they don’t release any chemicals or off-gasses.

In addition, cellulose and wool insulation are made of recycled paper products, making them environmentally friendly. Wool and cellulose can also be treated with fire retardants, meaning that they are resistant to both flames and smoke. In tests, a home insulated with cellulose and treated with borate has been shown to resist fire for longer than an uninsulated home.

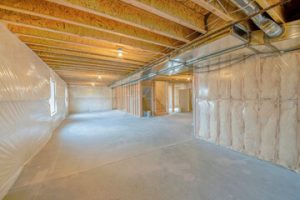
The type of insulation that is best for your home depends on your climate. Some insulation is better suited to cold climates, where it prevents heat from escaping, while other types are more effective in hot climates, where they block out unwanted heat.

Miles Fiberglass Composite Panel Reinforcement Kits Help Humvees Last Longer

Despite their limitations, the Humvee is an iconic military vehicle, and even though it’s being replaced in frontline service by the JLTV, Miles Fiberglass’s Humvee composite panel reinforcement kits are helping them last longer.

The Army’s High Mobility Multipurpose Wheeled Vehicle, or Humvee, first appeared in 1984. It was a major improvement on the classic military jeep. Contact Street Legal Exports now!

The military’s Humvee has conquered foreign battlefields and suburban soccer fields alike, but it’s now reaching a critical crossroads. It’s being replaced in frontline military service by newer models designed for the asymmetric warfare of the 21st century.

In the 1970s, the Army realized that it needed better vehicles to transport its troops. It wanted a “jack-of-all-trades” light tactical vehicle that could fill the roles of several existing trucks, including its Vietnam War-era M151 Jeep and the M561 Gama Goat.

AM General, Chrysler Defense and Teledyne Continental all submitted prototypes for testing. Eleven of these were tested across a range of conditions, from desert to Arctic climates. AM General’s design was the clear winner. It won a contract in 1983 to build 55,000 HMMWVs (Humvees are known by their official name, the High Mobility Multipurpose Wheeled Vehicle).

AM General’s Humvee was powered by GM’s 6.2L diesel engine with a Turbo-HydraMatic 400 transmission that delivered 850 lb-ft of torque. Its independent suspension and portal axles lowered the center of gravity, giving it 16 inches of ground clearance. It also had the ability to climb a 60 percent incline, traverse a 40-percent slope and drive through 2.5 feet of water with a snorkel.

The Humvee proved itself during the Gulf War, with its able to traverse challenging terrain and carry a hefty payload. Its popularity soared, and civilian adaptations such as the Hummer line were born.

Over time, however, the Humvee became less and less effective as an armored vehicle. The truck’s aluminum body proved to be tissue paper against roadside improvised explosive devices, and even with add-on armour, the Humvee wasn’t protected enough in urban combat.

Off-Road Capabilities

Since its introduction in 1983, the Humvee has conquered mud, sand, rocks, snow and more. It’s driven around the world on deployments, ridden inside CH-53 helicopters and sat on decks of Marine Expeditionary Units.

The military light truck has a lot to offer off-roaders and can be customized with various exterior and interior accessories. Aftermarket armor kits add protection for the vehicle’s occupants, while winches and climate control systems improve recovery and comfort. Interior upgrades like sound deadening reduce noise and vibration, improving the ride quality.

The HMMWV’s off-road capabilities come from the combination of a powerful engine, independent front and rear suspension and advanced shock absorbers. This allows it to tackle terrain that would stop other four-wheel drive vehicles in their tracks. The aluminum body is another key element, keeping the weight down while allowing the chassis to flex and reducing corrosion risk.

Despite their reputation as the ultimate offroading machine, military Humvees do have some limitations. They don’t have the same offroad flex as more agile SUVs, and they can easily get high centered or sink in water. They’re also not designed to rock crawl or jump dunes, and they can only carry two to ten US military men.

However, if you’re prepared to deal with some specialized maintenance and higher fuel costs, a Humvee for sale can open up a world of outdoor adventures. You can customize the truck to meet your specific needs, whether it’s a cargo hauler or a family vehicle. Just be sure to check with a specialist such as Street Legal Exports to ensure your Humvee is street-legal for use on public roads.

Armor

While the Humvee is an excellent off-road support vehicle, when it comes to urban combat, the aluminum body and frame don’t hold up to ballistic and IED attacks. When commanders assessed the needs of operations in Iraq and Afghanistan, they determined that the open-air vehicles needed some additional protection for troops on patrol or convoy duties. Rather than converting the trucks to armored combat vehicles, contractors began developing add-on armor kits for use on Humvees. Aberdeen’s Humvee Armor Survivability Kit (HASK) is the best known and is designed to protect against RPGs and IEDs by adding armored doors and windows, seatback protectors and steel plates on the hull and frame.

The Army’s Rock Island Arsenal also has a start-to-finish factory for producing armor kits for Humvees. Workers at the facility produce the HMMWV’s from the chassis up and are the only Humvee manufacturer to offer an entire armor package that can be installed on a regular Humvee without having to strip it down.

In addition to the HASK and the armor packages from Battelle and other companies, some Humvees can be equipped with the new Expanded Capacity Vehicle (ECV) system. Unlike the HASK, the ECV is fully modular and can be installed on Humvees with or without the aluminum hull. The ECV is intended to provide protection against IEDs and rocket-propelled grenades and can be fitted with a range of weaponry, including the Browning M2HB.50 caliber heavy machine gun and the Mk 19 40mm automatic grenade launcher.

Other modifications are available for Humvees, including acoustic insulation, more comfortable seats and internal garments and fixtures and a comprehensive Hi-Fi sound system. Even after all the combat upgrades, however, it is still possible for a terrorist to sabotage an up-armored Humvee by attaching explosive devices.

Seating Capacity

The HMMWV (abbreviated Humvee) is a family of light, four-wheel drive military trucks and utility vehicles. Designed by AM General, it has largely supplanted roles previously performed by the original jeep and other military vehicles, including the Vietnam War-era M151 Jeep. While typically seen with the United States military, the HMMWV has also been deployed by various other nations and organizations, as well as used for civilian adaptations.

The number of people a Humvee can carry depends on the model and configuration. The most common model, the HUMVEE, holds a driver and a squad leader in front seats with two passengers in the rear. However, other variants of the vehicle, such as cargo, ambulance, and machine gun, can hold more passengers.

In a combat engineer variant, the Humvee can carry up to five soldiers. The HUMVEE 4-CT is an expanded capacity version that can be used for a variety of missions, from command and control to armed patrol. It can also be equipped with a weapon mount and turret for additional protection.

The HMMWV M2A1 is capable of carrying six infantry soldiers in full combat gear and a crew of three. The vehicle is designed for use by infantry soldiers who are trained in exit points, fire drills, and rollover training. Soldiers who ride in the vehicle should have their rucksacks strapped to the outside of the vehicle, to minimize the risk of them being lost during the course of a mission. A HMMWV M2A2/ODS or M2A3 has benches in the troop compartment, which reduces the seating capacity to four soldiers. A HMMWV M3A1 is equipped with a turret, which further decreases the seating capacity to three seats.

Fuel Economy

The Humvee, or HMMWV, as the US Army calls it, is one of the most versatile light military vehicles in the world. While it’s primarily used by the Army, the vehicle is also used by other militaries and even in civilian adaptations. It has largely replaced other military vehicles, including the Vietnam War-era M151 Jeep and its M561 “Gama Goat” ambulance version.

The vehicle was designed to be as fuel efficient as possible, and it succeeded. The standard model has a diesel V-8 engine that produces a scant 113 horsepower and is paired with a three-speed automatic transmission. This powerplant is sufficient to move the vehicle at highway speeds. But it’s hardly enough to haul the 13,000-plus-pound curb weight of an armored Humvee when fully loaded with weapons, communications gear, and other necessities.

To address this issue, the Army has been developing a new generation of Humvees with improved powertrains. It’s latest prototype, the FED Bravo, was displayed at the Society of Automotive Engineers’ annual show in Detroit. The vehicle features a Ford diesel hybrid-electric drive system that uses a rear electric motor to drive the wheels and an integrated powertrain to help propel the front axles.

The vehicle’s redesigned powertrain and chassis are intended to improve on the performance of the original Humvee, as well as other JLTV entrants from Lockheed Martin, Oshkosh, and AM General. In a recent study, the Army and Marine Corps tested 22 up-armored Humvees alongside Oshkosh’s JLTV entrants, and the up-armored Humvees were the most reliable of the bunch, averaging 7,051 miles between operational mission failures (defined as a vehicle failure that prevents it from accomplishing its assigned mission).

How Exterminators Protect Homes from Pests

Bakersfield Exterminator plays a crucial role in safeguarding homes from the intrusion and damage caused by pests. Their expertise lies in identifying pest problems, implementing appropriate control methods, and preventing future infestations. These professionals rely on a combination of knowledge, skill, and modern technology to ensure homes remain safe and pest-free.

Exterminators

The first step in protecting homes from pests involves a thorough inspection. Exterminators begin by assessing the property to identify the type of pests present and the extent of the infestation. This step is vital as different pests require unique approaches for effective control. They carefully examine both the interior and exterior of the home, paying attention to signs such as droppings, nests, gnaw marks, or damaged structures. Their trained eyes can detect even subtle indications of pest activity that homeowners might overlook.

Once the inspection is complete, exterminators devise a tailored plan to address the specific pest problem. This plan typically involves a combination of methods to ensure effective eradication. They may use chemical treatments, traps, or mechanical methods depending on the type of pests and the severity of the infestation. For instance, chemical treatments might be employed to target termites, while traps could be used for rodents. These professionals are trained to apply treatments in a manner that minimizes risks to humans and pets while maximizing effectiveness against pests.

Preventing future infestations is another critical aspect of an exterminator’s job. After addressing the immediate problem, they take steps to ensure pests do not return. This involves sealing entry points, repairing structural damage, and advising homeowners on best practices for maintaining a pest-free environment. For example, exterminators might recommend keeping food properly stored, addressing moisture issues, and maintaining cleanliness to deter pests. By taking these preventive measures, exterminators provide homeowners with long-term protection.

Education also plays a key role in how exterminators protect homes. They often educate homeowners about the habits and behaviors of pests, helping them understand how infestations occur and how to prevent them. This knowledge empowers homeowners to take proactive steps in keeping their homes pest-free. For instance, they might explain the importance of regular inspections and highlight conditions that attract pests, such as standing water or clutter.

In addition to their technical expertise, exterminators rely on advanced technology and tools to enhance their effectiveness. Modern pest control techniques often involve the use of innovative equipment and environmentally friendly solutions. For example, heat treatments can be used to eliminate bed bugs, while baiting systems are employed for termites. These methods are designed to target pests with precision, reducing the need for widespread chemical applications and minimizing environmental impact.

Another aspect of an exterminator’s work is adapting to the unique challenges posed by each home. Every property is different, and factors such as location, construction, and surrounding environment influence pest activity. Exterminators take these variables into account when developing their strategies. For example, homes near wooded areas might be more prone to termite infestations, while urban dwellings could face issues with rodents or cockroaches. By customizing their approach, exterminators ensure their methods are effective and appropriate for each situation.

Exterminators also play a vital role in addressing seasonal pest issues. Many pests are more active during specific times of the year, and exterminators understand these patterns. They anticipate seasonal pest activity and implement measures to counteract it. For instance, they might focus on mosquito control during warmer months or rodent prevention as temperatures drop. This proactive approach helps homeowners stay ahead of potential problems and minimizes the risk of infestations.

Safety is a top priority for exterminators when protecting homes from pests. They are trained to handle pesticides and other control methods responsibly, ensuring they are applied safely and effectively. Exterminators follow strict guidelines and regulations to minimize risks to people, pets, and the environment. They also take precautions to prevent contamination and ensure treatments are confined to targeted areas. This commitment to safety gives homeowners peace of mind, knowing that their pest problems are being addressed without compromising their health or well-being.

Exterminators often work collaboratively with homeowners to achieve the best results. They provide clear communication about the steps being taken, the expected outcomes, and any necessary follow-up actions. This transparency fosters trust and ensures homeowners are well-informed throughout the process. Additionally, exterminators might schedule regular inspections and maintenance visits to monitor pest activity and address any emerging issues promptly.

In some cases, exterminators may deal with pests that pose significant health risks. For example, rodents can carry diseases, while certain insects can trigger allergies or asthma. By effectively managing these pests, exterminators help protect the health of homeowners and their families. Their efforts not only eliminate existing threats but also reduce the likelihood of future health concerns associated with pests.

Exterminators also understand the importance of addressing the root causes of pest problems. Rather than simply treating the symptoms, they identify and address the underlying factors that attract pests to a home. This might involve improving drainage to prevent water accumulation, sealing cracks and crevices, or addressing landscaping issues that provide shelter for pests. By tackling these root causes, exterminators create an environment that is less hospitable to pests, reducing the chances of recurring infestations.

Homeowners often turn to exterminators for their expertise in dealing with stubborn or hard-to-reach pests. Some infestations, such as termites or bed bugs, can be particularly challenging to manage without professional assistance. Exterminators have the knowledge and tools needed to handle these situations effectively. They employ specialized techniques and equipment to eliminate pests from even the most hidden areas of a home, ensuring a comprehensive solution to the problem.

Another key aspect of an exterminator’s work is staying informed about the latest developments in pest control. The field is constantly evolving, with new methods, products, and technologies being introduced. Exterminators undergo ongoing training to stay up-to-date with these advancements, enabling them to provide the most effective and efficient solutions to homeowners. This commitment to continuous improvement ensures that exterminators remain at the forefront of pest control practices.

Exterminators’ efforts extend beyond individual homes, as they also contribute to broader pest management in communities. By addressing pest problems at their source, they help prevent the spread of infestations to neighboring properties. Their work supports the overall health and well-being of communities by reducing the prevalence of pests and the risks they pose.

Ultimately, exterminators protect homes from pests by combining their expertise, advanced tools, and preventive measures. They address immediate infestations, implement strategies to prevent future problems, and educate homeowners about best practices for pest control. Through their dedication and professionalism, exterminators play a vital role in ensuring homes remain safe, comfortable, and pest-free.

The Basics of Roofing

The roof is an important part of a home. It protects the people and things inside the house from rain, snow, sunlight, extreme temperatures, and other elements.

Roofing

There are many different kinds of roofing materials. Each offers its own advantages, disadvantages, and costs. This article will cover the basics of Boston Roofing CO construction.

A roof can be made of a variety of materials, depending on what is available locally. For example, in tropical areas palm fronds may be used as roofing, and in Africa, mud or straw can be used to cover wattle-and-daub huts. In many homes and commercial buildings, wood shingles are still popular due to their availability and beauty. Concrete is another option for a roof, although it can be heavy and can be damaged by harsh climates.

One of the most durable roofing options is plywood, which is made from thin veneer layers (known as plies) of wood bonded together with adhesives. The plies are oriented perpendicular to each other, which gives the panel strength and durability. Another common type of wood-based substrate is Oriented Strand Board (OSB), which is similar to plywood but uses strands or chips instead of veneer layers.

Before the Industrial Revolution, the choice of roofing materials was limited to what was naturally available. Thatching, which used dried vegetation like reeds, straw or heather, was an early favorite because of its insulating properties and ease of installation. However, thatching was prone to fire and required constant maintenance.

Materials

A roofing job is not complete without the right materials and workmanship. The type of material to use will largely depend on your budget, as well as the climate in your area. The best way to ensure that your roof is long-lasting and attractive is to use high-quality materials. There are also certain roof materials that are not suitable for specific locations. Some of these include clay tiles, concrete, and shingles.

Corrugated galvanised iron (often called “Gal Iron”) is the most widely used roofing material in Australia. Its wavy corrugations allow it to resist lateral flexing and its exposed fasteners provide extra strength. It is an economical choice for sloped residential roofs and for utilitarian buildings like sheds. It is usually covered with a thick coating of mineral granules, and can be fixed either using a torch or by nailing it to the deck.

Slate is a popular option for roofing, but it’s not ideal in areas that experience frequent hailstorms. Slate can be prone to moss and mildew if it’s not well maintained. Fortunately, there are several ways to prevent these problems.

Another alternative to slate is clay tile, which is made from molded and fired earthen clay. This material is long-lasting and durable, and it can withstand storms and extreme weather. However, it can be heavy, and installing it requires the help of professionals from a roofing services company.

Concrete is a versatile roofing material that can be formed into different shapes and sizes. It is commonly used for low-sloped roofs, and it can be textured to resemble other types of roofing materials. It is also resistant to fire, but it can be prone to cracking and leaks in some cases.

Rubber is a versatile, environmentally friendly roofing material that can be manufactured to look like other kinds of materials. It’s relatively inexpensive, and it can last up to 20 years. However, it isn’t as strong as some other types of roofing.

An ice and water shield is a specialized membrane that protects vulnerable parts of a roof from leaking or ice damage. It’s often installed in the valleys of a roof and around penetrations, and it’s required by building codes in cold-weather regions.

Installation

When installing a new roof, there are many different processes that need to be followed. First, the site must be prepared. This includes covering surrounding landscaping with tarps and positioning garbage cans to catch any debris that may fall from the roof. It is also important to ensure that the area is free of any objects that could interfere with the installation process.

Next, the roofing contractor must remove any existing shingles and underlayment from the roof. This can be a messy job and should be done carefully to avoid damaging the underlying structure. Once this is complete, the contractor must prepare the area for the new shingles. This includes covering any landscaping and placing tarps over open drains to prevent any clogs from debris.

Then, the actual roofing process begins. This is typically the most repetitive and physically demanding part of the job. The roofing team will unfurl layers of underlayment and then shingle them one at a time. They will overlap the shingles and nail them in a pattern that is closer together at the edges and further apart as they move towards the center of the roof. They will also add in any flashing that is necessary, such as around dormers or valleys.

Once the shingles are installed, the roofing contractor must check that proper ventilation and insulation are in place. They will also test for leaks and other issues that could arise in the future. In addition, the roofing contractor will need to handle a variety of business-related tasks, such as scheduling, managing inventory, and negotiating deals with suppliers.

Maintenance

Whether on commercial or residential properties, the life of roofing is extended through preventative maintenance procedures and repaired as needed. In the long run, it’s cheaper to keep up with routine maintenance than to deal with major repairs and energy losses that are often the result of roof deterioration.

A maintenance procedure should be developed that is tailored to each roof. It should also include a checklist to document the status of a building’s roof. Keeping these lists current allows for early problem detection. Ideally, the inspections should be performed on a biannual basis, but may need to be done more frequently in geographic locations that experience extreme weather events.

The checklist should cover all parts of the roof, including shingles and membranes. It should note any leaking spots, water damage in ceilings and walls, and mold or mildew. It should also inspect for holes or dents. In the summer, unwelcome critters looking for cool shelter might enter through these spaces.

In addition, the roof should be inspected for accumulated dirt and debris. This can clog drains and cause a roof to deteriorate prematurely. It is particularly important to check for accumulated organic matter such as moss, which can degrade the shingle membrane.

Other items to check for are abrasions, loose materials and signs of water damage. It is important to identify any areas of deterioration, because they can lead to leaks and other problems down the road. It is recommended to have a trained professional repair these areas as soon as possible.

During the inspection, it is also a good idea to check for physical damage to the structure of the roof, including the trusses and beams, for rust or other signs of stress. This is especially true for a roof that supports heavy equipment or has a large snow load.

Safety is always a concern for roofing professionals. The checklist should include inspections of stairs, crossovers and platforms to make sure they are safe for employees to use. It is also a good idea to inspect for any required safety signage. If electrical, harmful chemicals or hot equipment is present, these should be marked accordingly to protect staff members.

What You Need to Know About Your Printer

From school reports to business documents, we rely on printers when it comes to creating hard copies. These hardware output devices accept print commands from computers and other electronic devices to print images or text on paper.

Printers can differ in terms of size, weight, brightness and material. The right choice depends on your needs and how often you print. Click https://www.dtgweb.com/ to learn more.

A printer creates hard copies of documents by applying ink or toner on the paper. It may be connected to a computer through a dedicated data cable like the USB, through a wireless network using short-range radios like Bluetooth, or on a standalone basis without a computer, using a memory card or portable storage device as the source of documents to print. A printer also accepts input commands from a user through a display screen and keyboard, or through a network using the serial or parallel ports on a motherboard.

The quality of the support, as well as its texture and flexibility, impacts how well it holds a printing plate or drawing point, resists compression from a vacuum suction table, or conforms to a molding surface for flattening and mounting for display or storage. The strength of the paper’s fiber network also affects its ability to withstand stress or bending (e.g., by being able to accommodate the shape of a molding surface).

Paper support can be made of wood pulp, cotton fibers, or other plant materials. The type of paper and its date, origin, and condition determine its typical texture. Its texture is influenced by its size, thickness, and consistency, as well as the presence of sizing, coatings, mending, lining, and drying methods. It can also be affected by previous attachments or their adhesive residues.

Pliability is the paper’s ability to flex or bend without breaking or disintegrating its fiber network, and is determined by the size, consistency, and date of the paper; the presence of coatings, sizing, and mending; and the degree of abrasion. It can be further modified by the use of mechanical damage (tears, burns, creases, abrasions, etc.), chemical degradation, and conservation treatments (alkaline treatment, aqueous washing, lining, bleaching, aging, flattening, surface cleaning).

When selecting media for a printer, be sure to choose papers that are compatible with the equipment and its settings. Mismatched media can cause paper feed problems such as jams and misfeeds. Most printers have special trays for different media types. These trays have labels that show the correct orientation for loading each type of media, as well as the maximum fill line for that tray.

Ink Cartridges

Printing at home or in the office, there will come a time when you need to replace your cartridges. Knowing how to read the label and understanding what’s different between ink and toner cartridges can help you make the right choice.

Ink Cartridges are filled with tinted liquid ink or additives that allow the printer to produce a variety of colours and shades. They contain a common set of parts including an ink chamber, nozzle plate and power source (for Piezoelectric printers). Ink cartridges use heat and pressure to spray ink onto the paper, depending on the colour required. Ink is a mixture of water and pigments or dyes, which help with page retention and produce accurate colour.

Toner Cartridges are filled with a fine powdered substance, usually toner. Like ink cartridges, toner cartridges are available in a range of sizes. Monochrome printers use one toner cartridge, while colour printers require four: black, cyan, magenta and yellow. Toner cartridges can be purchased from the manufacturer of your printer, or from third-party providers. Third-party providers are able to offer a number of benefits, including competitive pricing and high-quality toner.

The quality of a print job depends on the amount of toner in the cartridge and the condition of the printer. When a cartridge is empty, it will show an indicator light and may stop working altogether. It is recommended that you purchase a new toner cartridge when this happens, to avoid wasting any of the remaining toner in the device.

Many myths surround the use of third-party cartridges, such as the idea that they can damage your printer or invalidate your warranty. However, if you buy from a reputable supplier then this should not be a problem. It is also worth remembering that if you have the original cartridges for your printer then there is nothing to stop you using compatibles.

The cartridge type you choose will depend on your budget and the quality of prints that you require. For example, XL ink cartridges are designed to hold more of the printing substance, meaning that they will need replacing less often. This can save you money in the long run, although you should bear in mind that a higher-yield toner cartridge will take up more space in your printer.

Paper Feeders

A printer or scanner may include a paper feeder, which allows it to scan and print multiple sheets of paper. It can be a great asset when you have high volumes of documents to scan or print. It also saves time and reduces errors due to hand feeding each document one by one. However, it is important to understand how a paper feeder works so you can use it correctly.

An automatic document feeder (ADF) is a feature in multifunction printers, scanners, and fax machines that feeds documents into the device. It replaces the traditional method of scanning a document with the flatbed glass.

The ADF is useful in high-volume printing or copying, and it can be used to scan documents from thicker materials such as cardstock. It is also easy to use, making it an ideal choice for busy office environments. Whether you’re looking for a printer or scanner with an ADF, look for a model that can accommodate the types of papers you use most often.

There are many different types of ADFs, with some able to perform more functions than others. A duplex ADF, for example, can scan both sides of a document in a single pass. It’s also possible to find ADFs that can automatically flip a document after it has been scanned once.

If you want to print double-sided documents, it’s essential to choose a printer or scanner with a built-in duplex ADF. Otherwise, you’ll need to manually flip the document after each scanning session.

Other features of a multifunction printer with an ADF include the paper support extension, which helps to support longer paper that is loaded in the sheet feeder. The edge guides are used to keep the paper straight, and you can adjust them to fit the width of your paper. The document cover is used to protect the printer mechanism from dust and debris, and it opens when you need to access the cartridges or output tray. The control panel is where you can view the status of the printer and select various settings.

Print Head

The print head is one of the main components that defines the quality of printed text and images. It is crucial to have a good understanding of its role and working principles. The print head enables the printer to transfer ink onto paper with precision. This is done using different technologies based on the type of printer. For example, thermal inkjet print heads in HP and Canon printers use heat to eject ink droplets and Piezoelectric print heads in Epson printers use electrical charges. These technology differences contribute to the wide variety of printing capabilities in the market.

There are many factors that affect the print head’s performance, such as the number of nozzles, the design of the actuator, and the ink platform used. For instance, inkjet print heads that use smaller drop sizes produce finer detail and smoother gradients. These features allow them to achieve higher resolutions than traditional inkjet printers.

Other factors that influence print head performance include the type of ink, the printhead’s materials, and the ink’s viscosity. Choosing an ink that is well-suited to the print head and paper can significantly improve print quality. In addition, the print head’s material and design can determine how long it can function effectively before maintenance is required.

To ensure the longevity of the print head it is essential to clean it regularly. The best way to do this is by using the printer’s cleaning utility. The head should also be kept away from water and other environmental influences that can damage it. Also, it is a good idea to avoid touching the print head with bare hands since the oils on your skin can leave residue on the surface of the head. A non-abrasive lint free cloth or isopropyl alcohol (90% or higher) can be used to clean the head. It is recommended to use this cleaner after every ribbon change for thermal transfer printing and after every media change for direct thermal printing. It is also important to monitor how dirty the cloth gets and adjust the frequency of cleaning as needed.

Mold Removal – How to Get Rid of Mold in Your Home or Office

Mold is more than an unsightly nuisance; it can also be a health hazard for the occupants of a building and can damage materials and structures. This is why it’s important to find effective solutions to deal with the problem as soon as possible. Contact Mold Removal Salt Lake City for professional help.

Mold Removal

Before proceeding to the cleaning, always put on rubber gloves and a face covering to avoid direct contact with mold spores.

Once the source of the mold is found and the water issue is fixed it’s time to begin the clean up. This can be done by either a professional or, for smaller areas, it is possible to do on your own. The first step in cleaning up mold is to wipe the visible surfaces. This can be done with a damp cloth or with a mixture of oxygen bleach and hot water. Pour the solution into a spray bottle and saturate the area. Allow it to sit for 10-15 minutes and then wipe it clean. The area should then be air dried. This can be done with a hair dryer or room fan, and it’s important to keep the windows and doors open.

The next step is deeper cleaning and scrubbing. This is where products like vinegar or clear ammonia come into play. They can penetrate the surface of porous materials such as drywall and wood, removing hidden spores. It’s also a good idea to use a cleaning product specifically formulated for mold as these tend to be more effective than standard household cleaners.

When using vinegar or any other cleaning agent, it’s always best to wear rubber gloves and a face mask to prevent inhalation. Also, never mix ammonia with any other chemical as it can produce poisonous gas. For more stubborn stains, try mixing baking soda with water to make a paste and scrub the area. Be sure to rinse and dry thoroughly.

For more serious issues, it may be necessary to use a mold-removal kit or antimicrobial cleanser. This type of cleaner contains chemicals such as sodium hypochlorite (bleach) or formaldehyde that penetrate the surface of the material to kill the spores. It’s always a good idea to hire a professional for this type of remediation.

Regular cleaning and inspections will help to stop future mold growth by preventing the accumulation of organic material, which is what causes the spores to grow. It’s also important to regularly dust and vacuum. This will prevent the buildup of dust and other debris, which can trap moisture and cause new growth.

Remove the Infected Materials

The next step of mold removal is to remove any infected materials from the affected areas. This is the most intensive part of a cleanup and it involves removing porous materials, like carpet or fabric, that can’t be cleaned, as well as non-porous materials, such as wood and drywall, if they are infested with mold. The items are bagged and thrown away to reduce the risk of spreading mold spores.

To limit the spread of mold spores during this step, it’s best to isolate the work area and cover any vents that can’t be covered. Closing doors and hanging plastic sheeting between the affected and unaffected areas is also helpful. Using a fan to pull contaminated air away from the area and exhausting it outdoors can help as well. A HEPA filter on a vacuum cleaner can reduce the amount of mold spores that are redistributed when cleaning.

Mold can be damaging to the materials it grows on and can also cause health effects for occupants. People with asthma, allergies, or other respiratory conditions should avoid any area where mold is present. If an individual’s symptoms worsen after being in a moldy environment, they should contact their healthcare provider.

It’s important to check and fix any water leaks in the property as soon as possible to prevent future problems with mold. Any wet materials should be dried as quickly as possible using dehumidifiers, wet/dry vacs and fans. It’s a good idea to use an EPA-approved fungicide on any porous or semi-porous items that are infested with mold. Non-porous materials should be scrubbed with soap and water to ensure they are clean and sanitized.

Many items that are damaged by mold can be saved if the situation is caught early. However, it’s important to have a professional mold inspection and mold cleanup before trying to save any items to make sure that the mold is fully eradicated. This also ensures that the property is safe for prospective buyers or renters. Regular health checks can also stop mold from recurring after the cleaning process is complete.

Disinfect the Area

Mold spores can become airborne, irritating the nose, eyes, and throat of anyone exposed to them. These spores can also trigger asthma and other respiratory problems in sensitive individuals. As such, it is important to clean and disinfect surfaces affected by mold.

Chlorine bleach can kill mold on hard non-porous surfaces such as sinks, tubs, and tiles. It can also be used to wipe off wood and drywall that is infested with mold. Before using bleach, be sure to read the product label and follow the manufacturer’s directions for use. Bleach can irritate the skin, eyes, and throat and should be avoided if possible by those with sensitivities.

Clorox Disinfecting Bleach and Tilex Mold & Mildew Remover both contain the chemical sodium hypochlorite (bleach), which is effective at killing mold. These products can be purchased at most grocery stores and hardware stores. Both products are recommended for use on areas that are heavily infested with mold and should be wiped down thoroughly with a cloth or sponge to ensure that all the spores are removed.

White vinegar is another natural and effective way to kill mold. It can be sprayed directly onto the surface and scrubbed with a brush. After scrubbing, the area should be rinsed with water and left to dry completely. If the mold is very stubborn, a mixture of equal parts white vinegar and water may be applied to the area.

Ammonia can also kill mold on hard non-porous areas, but should be used with care because it is a harsh and toxic substance. Ammonia can also cause dermatitis in sensitive individuals. A safer alternative is to mix a solution of 50% clear ammonia and 50% water in a spray bottle and apply it to the surface.

The most effective natural solution to kill mold is tea tree oil, a powerful antifungal agent that can be found at many health food stores. It is derived from the plant Melaleuca Alternifolia and should be added to a water solution in a ratio of 1 teaspoon oil per cup of water.

Clean the Air

Using a dehumidifier to lower moisture levels is a good idea when dealing with a mold problem. It reduces the likelihood of future mold growth and re-contamination. Also, a professional can use more advanced equipment like a thermal imaging camera to detect hidden moisture behind walls and under floorboards. This information can be extremely useful in identifying and repairing the source of the moisture.

Most importantly, you must take the time to dry the affected areas. The use of wet/dry vacs, dehumidifiers and fans will expedite the process, as materials dried within 24-48 hours will not be able to grow mold. Porous materials such as drywall and insulation should be bagged and discarded if they are moldy.

For larger patches of mold, you can use common household products to kill the fungus and prevent further growth. The best choice is a mixture of white vinegar and hydrogen peroxide. These natural substances are effective at killing both the visible spores and the underlying roots that often go untreated.

Make sure to wear personal protective equipment (PPE) such as a respirator, gloves and non-latex, vinyl or nitrile rubber gloves while handling moldy items. Mold spores can be inhaled or ingested, resulting in a range of symptoms including sneezing, runny nose, coughing, itchy eyes, rashes and other irritations.

Mold removal can be a daunting task, but it’s vital to protect your health and the safety of those living or working in the affected area. If you’re unsure of what to do or need assistance with mold cleanup, contact a local mold remediation company. They have the training and experience to safely and effectively clean up mold and can advise you on the best preventative measures to take in order to keep the problem from recurring. They will also be able to identify the source of the mold and recommend the corrective action necessary. Depending on the severity of the mold, this may include repairs to plumbing or the structure itself. It could also mean removing carpeting, drywall and other building materials. Then the area can be cleaned, disinfected and re-inspected for any signs of mold.

Essential Tools For a Handyman

Handyman Naperville is a skilled professional who can perform various tasks. They often save homeowners time and money by eliminating the need to hire a more specialized contractor.

They make holes, cracks, and dents disappear to revive indoor spaces’ visual and structural integrity. They also know how to mount light fixtures and can fix small electrical concerns.

Fish tape is a tool that allows handymen to run wires behind walls, in crawl spaces, or inside ducts without having to cut holes in the drywall. It’s also ideal for navigating around obstructions like framing members, concrete block, or plumbing.

Often coiled in a plastic reel, it’s easy to extend the fish tape to the area where wiring is needed and then push it through. It’s usually non-conductive for safety around energized wires, and it can come in either steel or fiberglass versions. Fiberglass is lighter, less prone to kinking, and resistant to corrosion in damp environments. The most common steel fish tapes are rated for a specific conduit size, but you can also find ones that are able to navigate short runs through walls or ceilings.

Some fish tapes even feature a built-in light that helps you see the area you’re feeding wire through better. It’s an ideal option for datacom techs who need to snake cables through a dark overhead plenum or drop ceiling. Other innovations include a variety of measurement markings on the fish tape itself, which eliminates the need for an additional measuring device, as well as rust-resistant, laser-etched marks that won’t scratch off over time.

Before you use your fish tape, prepare it by stripping insulation from the end of each wire. Wrap the bare wire ends together and then twist them through the fish tape hook to align them, and wrap the entire hook and wires with electrical tape. It’s also a good idea to apply some kind of lubricant to reduce friction as you feed it through the wall or conduit. Once you’ve reached the desired location, pull the fish tape back through its casing to re-coil it for another trip.

Electrical Tape

Electrical tape is a handy tool for a variety of projects. It offers insulation, protects wires from abrasion and corrosion, helps make temporary pigtail splices, and can even be used to make quick repairs. However, it’s important to understand how to use electrical tape correctly to ensure safety and success on the job.

There are several types of electrical tape, each with its own specific use and intended application. It’s important to select the right tape for the project based on its voltage and temperature rating, environmental conditions, and more. For example, if the work will be performed outdoors, look for a tape that has a higher temperature rating and can withstand cold temperatures.

Another key thing to remember when using electrical tape is that it works best when molded to the object rather than being wrapped rigidly over it. Stretching the tape while wrapping it allows for a tighter application that better seals the surface. Finally, it’s important to overlap the first and last wrap by at least half of the tape’s width.

Lastly, electrical tape is often sold in different colors. This is not to confuse the user, but to allow for easy identification of different wires and items. Knowing what each color represents is important for the safety of a task, as careless use of these tapes can lead to major electrical issues.

There are also other tools that can be used by a handyman to assist in electrical projects, such as heat shrink tubing and wire connectors. In general, these products are used in the same way as traditional electrical tape, but may be more suited for heavy-duty applications or harsh environments.

Miter Saw

A miter saw is an important tool for any handyman, since it allows them to quickly and accurately cut wood for projects. Its main purpose is to make angled cuts, called miters or square butt joints. This allows for the fast and easy assembly of picture frames or other box-type projects. It is a simple table saw that swivels the blade and head to create different angular cuts by simply rotating the base or the work piece.

The swiveling action also makes it possible to make a bevel cut by tilting the blade from vertical to angular across the workpiece. These two kinds of cuts are often combined to form compound cuts. Some models include extensions to support longer pieces or have stops that flip up for repeat cuts. Other features include a laser or indicator, an adjustment handle and a trigger.

Before using a miter saw, it is important to familiarize yourself with the equipment and its operation. Refer to the manual for more information. It is also a good idea to test out the saw on some scrap material. Be sure to wear safety glasses and ear protection, as the saw is quite loud. The miter saw should also be properly calibrated. Start by checking the blade to ensure it is aligned with the fence and perpendicular to the base. Next, check the bevel adjustment to see if it is set correctly. Finally, test out the miter cut by cutting a piece of scrap lumber and seeing where the laser lands on it.

After using the miter saw, clean up the area and the saw. It is recommended to use a shop vacuum rather than a household one, as this type of saw produces a lot of dust. A dust collection bag is an optional accessory, as well.

Hammer

A hammer is one of the most essential tools for any renovation contractor. It’s a handheld tool that consists of a handle and a head. Hammers can be used for various purposes like driving nails, pounding metal, and breaking apart objects. There are several types of hammers that can be used by handymen, such as claw hammers, ball-peen hammers, and sledge hammers. Some hammers also have interchangeable heads that can be switched out.

A handyman will typically carry a variety of different hammers in order to complete their jobs. They can use these to perform various tasks, from drywall installation to carpentry work. Having access to a wide range of tools allows them to save time and money by not having to go out and rent or buy new equipment each time they need to tackle a different project.

The hammer is an ancient and versatile tool that has been used by many different cultures throughout history. It is often associated with power, strength, and the gods. It is often used as a symbol in flags and heraldry. It is also commonly seen in religious icons and as a symbol of mining.

When used correctly, the hammer can be an effective trading signal in the market. It can help to identify reversals and buy signals, especially when accompanied by a strong candlestick pattern. Traders can then place their stops below the low of the hammer pattern, providing protection in case the price does not revert upward as expected.

A hammer can be a very dangerous tool when it is not used properly. It is important to always wear safety glasses when hammering. In addition, it is important to avoid using every ounce of your body’s strength when hammering. This can lead to wild swings and bent nails. Instead, the weight of the hammer and your smooth swing should provide enough force to do the job.

Tape Measure

A tape measure is an important tool for handymen, providing a quick and accurate way to make measurements. A tape measure can be used to find the length of a board or piece of furniture, as well as to determine the distance between two points. It can also be used to cut wood to size. In addition, a tape measure can help to identify electrical wiring in a home or office.

A standard tape measure has inches on one side and metric measuring markings on the other, but there are also dual-scale tape measures available that have both measuring scales. It’s important to choose a tape measure that meets your needs.

Some tape measures include markings for stud spacing in construction, making it easier to locate a stud without using a stud finder. Some also feature a sliding hook that moves back and forth slightly to compensate for the thickness of the metal end, ensuring that you get a true zero measurement every time.

Most tape measures also include a lock to keep the tape in place when you’re carrying out a measurement. It’s also important to take care of your tape measure so that it lasts as long as possible. One mistake that many people make is to let the tape snap back into its case at full speed. This can damage the internal recoil mechanism and lead to inaccurate readings.

Instead, it’s best to guide the tape back slowly so that it retracts smoothly and doesn’t cause kinks. You should also periodically check to see that the end hook is still securely attached. If it is loose, you’ll need to replace it.

Navigation